Wednesday, May 1, 2013

Changing the Speed sensor in a 05 Kia Sedona

34 comments

Hello out there. Recently I was in need of some direction on how to replace the Input and Output speed sensors on my 2005 Kia Sedona. After a significant time scouring the internet I was only able to come up with the information that they were both on the transmission. Well Duh of course they. Taking the approximate location from what I could find I went to it. Here are some pictures on how I went about doing this. I hope these help other who are trying to get these taken care of as well.  

1) First thing that we need to do is remove the air filter housing. Everything will be located under this. There are four bolts that must be removed to take the top off. I have pulled out the first one in this picture. There is also a clamp holding at hose coming off of the housing. This will need to be undone as well.


2) Now you will need to loosen the clamp holding the top half of the housing on. This is located above the back bolt. Once this removed you can get in to the air filter. I would say that this is a good time to check that and possibly replace if needed.

3) There are 3 nuts and 1 clamp holding on the bottom half of the housing. These are a 12mm bolt If I remember correctly. The shot on the right is of the two nuts in the back. On the left are the two from the back removed and the location of the third in the front of the housing. The clap that needs to be undone is under my fat hand. Once everything is unbolted I pulled up the housing starting from the side nearest the fire wall. This helped is slip right out.


4) I found that it would be much easier if I removed the hose that was attached to the top half of the housing. There is a sensor that needs to be unplugged (a). A Clamp that will need to be loosened (b). and a small vacuum house that will need to be un clamped as well (c). Now it should just be able to slide right out.


5) Now that the housing for the air filter has been removed we can see the location of where the sensors are. I have labeled them in the picture. I found a lot of information saying that the input was on  the back side of the transmission close to the fire wall and that it would be easiest to get at it from under the car. This was not the case for me. I am not sure if that was changed for a different year or model but both of mine were on top of the tranny.

6) Before taking out the sensor I would make the suggestion to clean out the part of your engine compartment where the sensors are. You do not want any small debris falling into your transmission. I just used a shop vac for this. Now just unbolt and slide out the old output sensor. I believe that I used a 10mm size socket to remove the bolt. Then you are able to unplug the cable. To install just reverse the process. There may be a slight amount of resistance when sliding the new sensor in as the o-ring that is on the sensor will need to slide down in to keep the tranny fluid in.
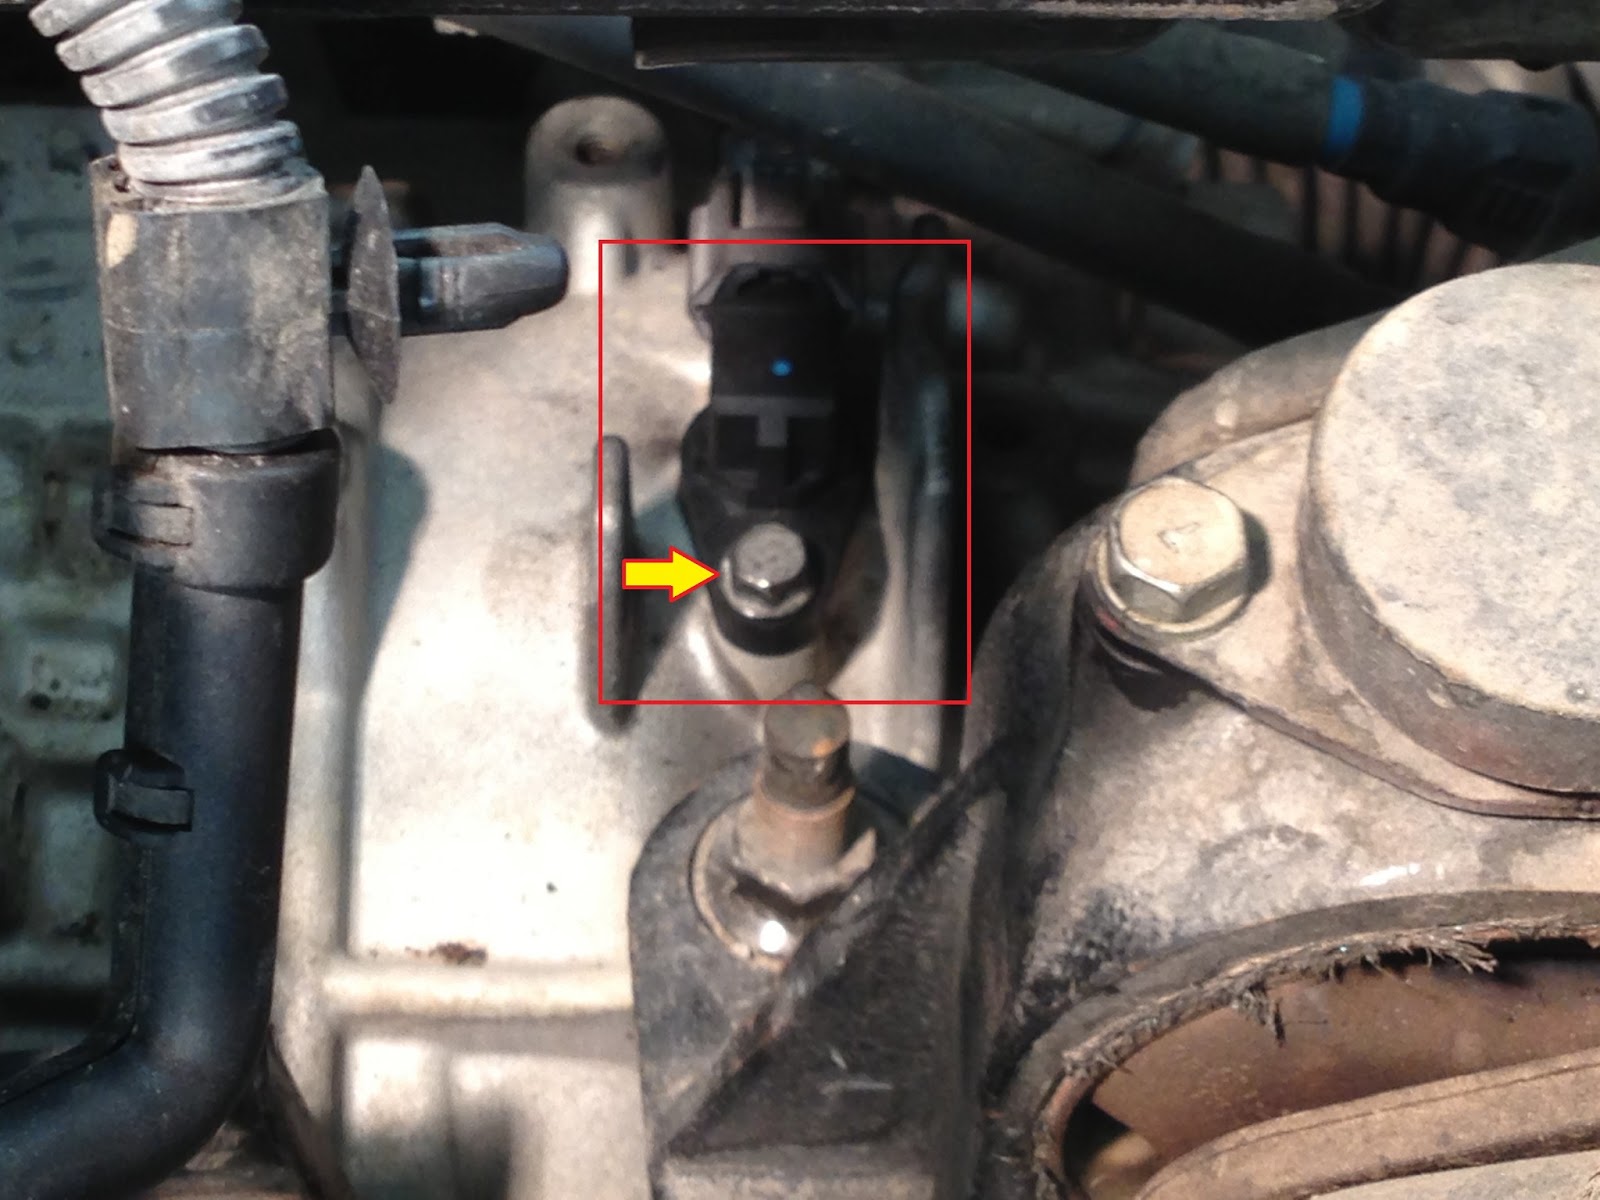
7) The Input sensor is a little more sneaky. It is hiding under a plate that needs to be slide to the side. There are This picture is looking at it from the driver's side of the car. I have removed to the two bolts that were hold it down.

8) Once they are removed you can turn and slide the plate out of the way. This will grant you access to the bolt holding the sensor in. Just unbolt and slide the old sensor out. I use a reaching tool to help pull out and place my bolts that way I don't drop them down into the engine compartment.


Now you can slide the new sensor in. Remember that there may be some resistance as the o-ring needs to slide down in and seal around the sensor to keep the fluid in. Replace your bolt and tighten down.


9) Now you can work backwards and put everything where it goes.

This is a very easy project that someone with very limited skills can perform. All in all I would say that it should take you about 30-40 min to get this done. I got my sensors online for $50 for the pair. I am sure that they also sell them at local auto stores. If you do buy online make sure to check out the seller to know who you are buying from.

Good luck
~ MadMek


Friday, March 2, 2012

Warboss and book updates

0 comments

Now that the Holidays are over and I am finally done with the job search I can try to get some more work put back into modeling. To keep myself in touch with the 40k universe I have been reading the Horus Heresy novels while waiting for the next Nightlords one to come out. For those that have not read these books they are great. I know where they will end up ultimately since I am familiar with lore of 40k, but I still could not help but root and cheer for Horus and the Luna Wolves. Currently I am in the 3rd novel and I love it.

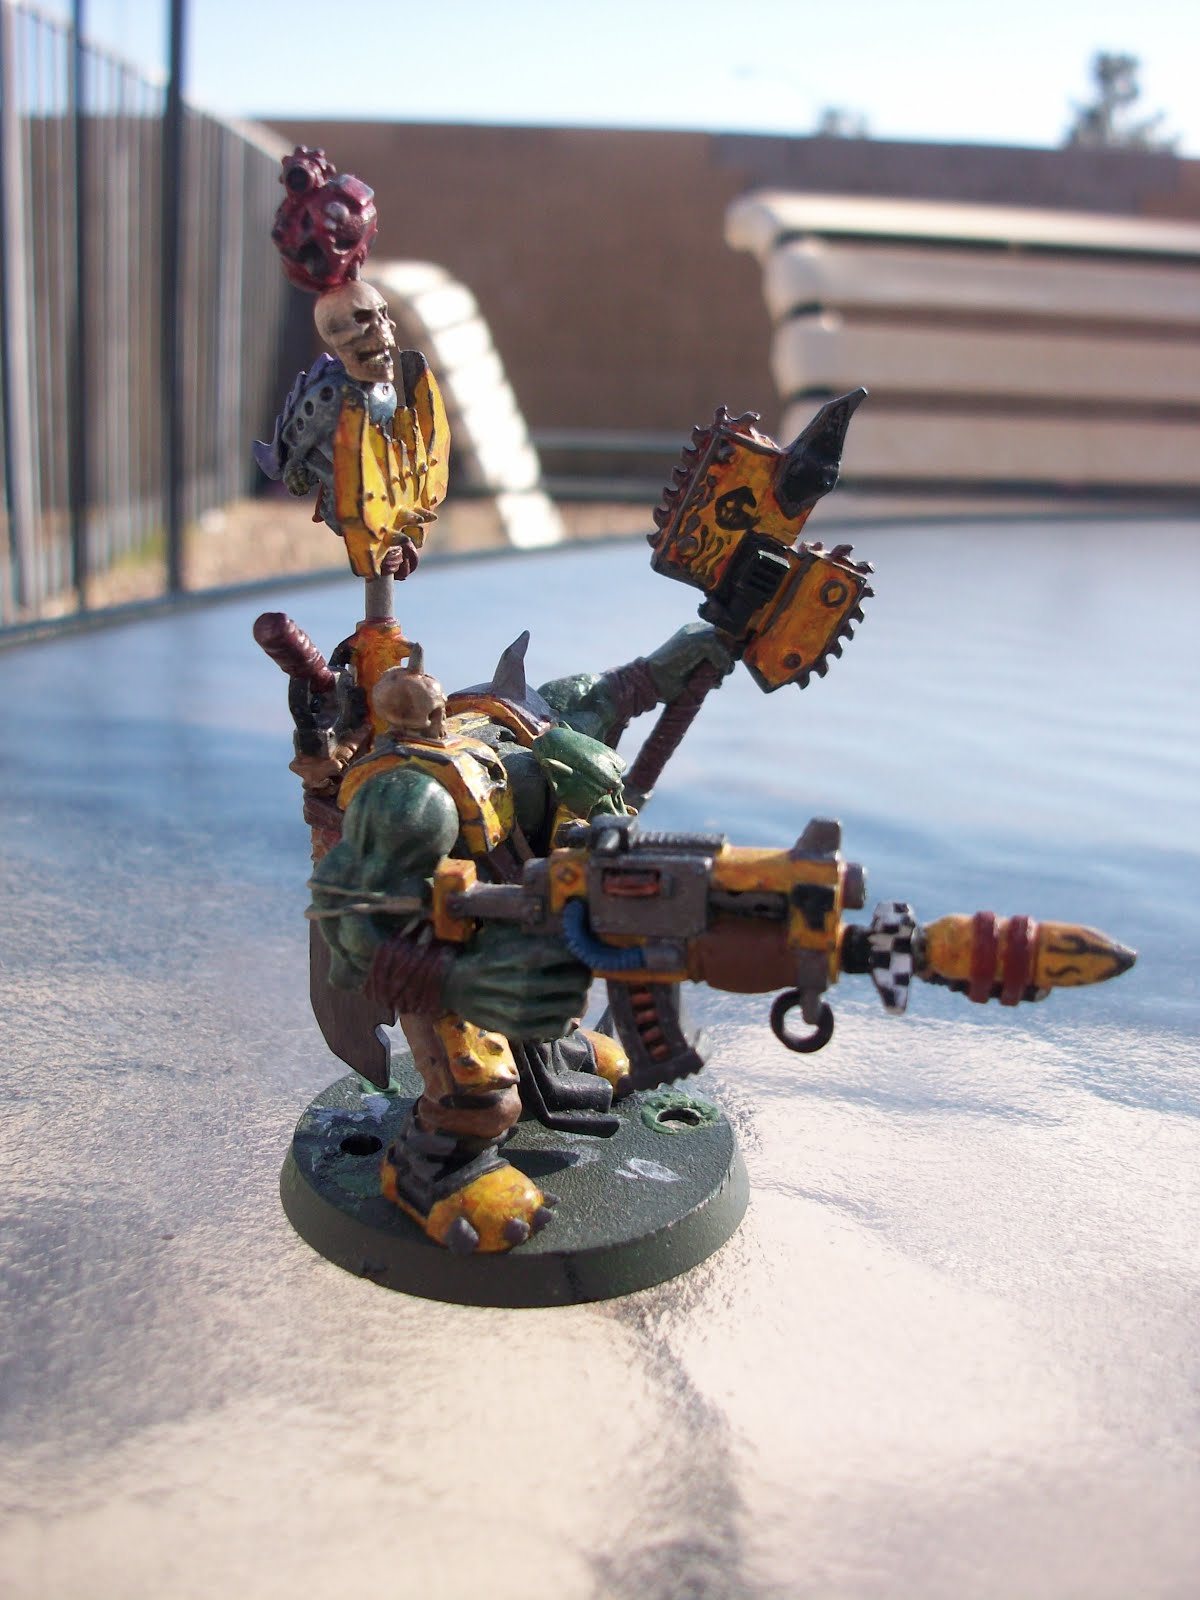
On the modeling front I have pretty much finished of my Warboss.

Gornaz started life an AOBR model. I added a custom made Big Choppa in place of the powerklaw. He also has a Shoota/Rokkit Kombi-Weapon. I had fun changing up his Bosspole which necessitated a small change in the backpack that he has. I added in a small choppa in place of one of the shotguns that he had.


Untill next time
Mad Mek

Wednesday, December 14, 2011

Follow up on Helping Jenny

0 comments
Also I wanted to let everyone know that they can donate money if there is not an Item that they are interested in. I am helping with the cake from Spatula City Cakes. LOL I know that makes you want to run right out and bid on that one.

Any help that we can show this family would be awesome.

Happy Holidays!


- The Mad Mek

Tuesday, December 13, 2011

Helping JEnny

0 comments
I wanted to share a link that I thought would be very helpful this time of year. This is for a family that has gone through quite a lot in the past several years.

In 1996 Jenny was diagnosed with breast cancer. She fought through and they thought that it was beat. It came back in 2003 in her spine. She endured more chemo and treatments to push through and survive. Again they got past. 2007 the cancer resurfaces in her lungs and spine this time. She is continuing to fight!

For those that know someone that has gone through this battle you know how it can burden a family. Jenny’s daughter has set up an auction to help with their holiday. Please take a moment to look and see if there is something that you could use or possibly give as a gift this holiday. The link to the auctions is http://helpingjenny.blogspot.com/

The locations of items are set in Mesa/Tempe, Arizona; Salt Lake City, Utah; and Pasco, Washington.

Thanks for looking
The Mad Mek


PS. Next post I will have some WIP shots of the AOBR Warboss I have been working on.

Monday, November 21, 2011

Finished Nob

0 comments
Well, here is the first finished Nob for my Ork army. I am going with a Bad Moons theme over all. Vehicles will be done in red with Evil Sun drivers. I am looking for suggestions on a list. Looking for 2000 pts when all is said and done. I will take all suggestions and then post what the final will be. The only things that have to be in there are the following:

Sunday, October 23, 2011

0 comments
It has been a great while since I have been able to post anything in the Shop. Going back to school has really taken most of my time. Today's post I have a quick shot of a GK costume and some info on Night Lord Novels.


Saturday, October 30, 2010

Happy Halloween

0 comments

HaPpy HaLlOwEeN

From the shop!

Wednesday, June 2, 2010

Finished piece of terrain

0 comments


Here is the finished piece of terrain that I was working on.


And some close up shots of the statue


Side shot of the "building"


You can see that there is a second piece of the building that allows you to create the building size that you want. I am in the process of creating debris to place in the center to count as difficult terrain.


Thanks, let me know what you think. I am almost done with a factory style building. Once that is done I will get some shots up here. I have gotten a little more done on the Orc bosses as well. They are in pieces right now as I am finishing of the GS work. I will get some more wip shots up once they are back together.

- Gormek

Monday, March 1, 2010

WIP Warboss, and his brother

2 comments

After taking a little break I have gotten back to work on my Ork army. Here are some wips of my 2 HQs. Gormek, and Mekgor both come from AOBR. I did want them to look exactly the same so there is some conversion going on. Please keep in mind that the GS is still pretty rough, and needs to be smoothed out

Gormek is the more tame of the two, but let not forget he is still an Ork. I have changed his boss pole up a little bit. Also, I have added a rope with skull off the end of the gun. I am also giving him an ammo runt. Right now he is looking pretty rough. I am in the process of adding a flag to his pole.


Mekgor has a little more work going on. Mekgor is also getting a an ammo runt, and a new boss pole. Big things are his powerclaw has been replaced with a Big Choppa. The Shoota has been converted into a Shoota/rokkit kombi. I have a rough large knife added in place of one gun on the back pack.


Last is a quick shot of a piece of terrain I am working on.

Let me know what you think.

Monday, December 7, 2009

How time flies

0 comments


Wow time flies by at this time of year. I just relized that I have not had time to do any real work, on either the Tau or the Orks.

I thought that I would post up some pictures of our last game. No real battle report right now, just a quick overview. We started with 5000 points per side. It was Lynn and Pat with the Orks, and Norm’s Nids against, Jake using some White Scars, and my Tau. It started out slowly with most of the fire being directed at Lynn’s newly constructed Stompa. It was strange to have it on the table. You can’t just leave it alone or you die, but If you direct all your fire at it, the boys and nobs can make their way to you. You can guess what happens then, you die. Needless to say we decided to direct our fire at the Stompa. With a lack in the details department the basic was My Tau against pats Orks, and the scars handling the Nids, and Stompa. The game came out as a draw after two nights of playing. All in all it was a great game of mass amounts of death.

Here is a shot of my Gun drone Squad facing down the Greenb Horde, as the girly White Scar Termies hide in the building.


Over all shot of the table about half way through the game.


Just a front shot of the new Stompa. "Boss Diz onez made for Stompin!"

Monday, August 17, 2009

Never run down the center to save time!

0 comments
And here are the pictures:


Here is an overview of the table. Just sitting on the side waiting to go.

The plant was the corner of the play area. The was moving in to try to get to the first objective.

This was the move into the building. you can see the first objective maker I captured.

Here is a shot of the Nids swarming the Termies.

Here is a shot of the Nids trying to flank the SM.

Orks holding the building and taking pot shots at the Marines across the way.

Here are the Tau lead by the Kroot trying to run up the center in front of the Orks.


Last a shot of what was left after the assault phase.